Programming Microcontrollers with Arduino
May 16, 2016 - 2 minutes
Coding Electronics arduino microcontrollersRecently I went to a workshop on programming microcontrollers with Arduino, hosted by the awesome Stephanie Hurlburt. My expertise being more in software than hardware, I was super excited to try it out.
Turns out it’s pretty easy to get started building a basic circuit – assuming you already have the hardware (microcontroller, breadboard, resistors, USB wire, any LEDs and other doohickeys you may fancy), you just download the right USB driver for your microcontroller and get the Arduino IDE.
I found Ladyada.net’s great Arduino tutorial to be very helpful for getting started. Lesson 1 explains how to configure the Arduino software to work with your particular chip, and how to upload sketches (which are the scripts used to program your microcontroller). Lesson 3 covers the electronics fundamentals behind setting up the breadboard. After that, it’s mostly a matter of learning how to build programs to handle various aspects of the microcontroller – working with the Serial library, using inputs and outputs, and of course making lights blink.
My workshop partner and I created a super simple program that mimics an absurdly fast stoplight. Basically it runs in an endless loop, making first the green light go on, then the yellow light (for a shorter amount of time), then the red light.
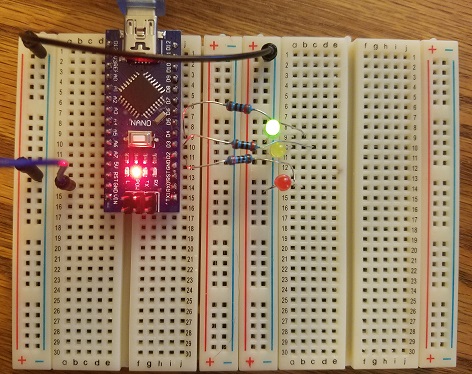
There’s a picture of the LED stoplight setup. Each LED has a resistor connecting it to a socket on the microcontroller – for example, the lit-up one in the picture, the top green one, is connected to the D4 socket.
So in the setup function in the sketch, the three LEDs are initialized as outputs, which looks like this:
void setup()
{
  pinMode(2, OUTPUT);
  pinMode(3, OUTPUT);
  pinMode(4, OUTPUT);
}
Then there’s the loop function turns the LEDs on and off by manipulating the voltage level.
void loop()
{
  digitalWrite(4, HIGH); // This turns on green LED at pin 4
  delay(1000); // Leave the light on for a second
  digitalWrite(4, LOW); // This turns off green LED at pin 4
  digitalWrite(3, HIGH);
  delay(500);
  digitalWrite(3, LOW);
  digitalWrite(2, HIGH);
  delay(1000);
  digitalWrite(2, LOW);
}
And that’s it! Plugging in the microcontroller and uploading that sketch causes the lights to blink in sequence. Yay!
Next step for me is buying a ton of parts from Adafruit and experimenting to see what kinds of cool stuff I can create now.